
Woodworking is a very hands on hobby and using a hand plane is one of the most rewarding and satisfying elements of this craft.
A finely set plane with a razor sharp blade will have you slicing through wood with that unmistakable sweet sound. This post will help woodworkers at any level with learning how to adjust their plane as well as some other helpful hints so that you can start knocking out those woodworking projects on your list.
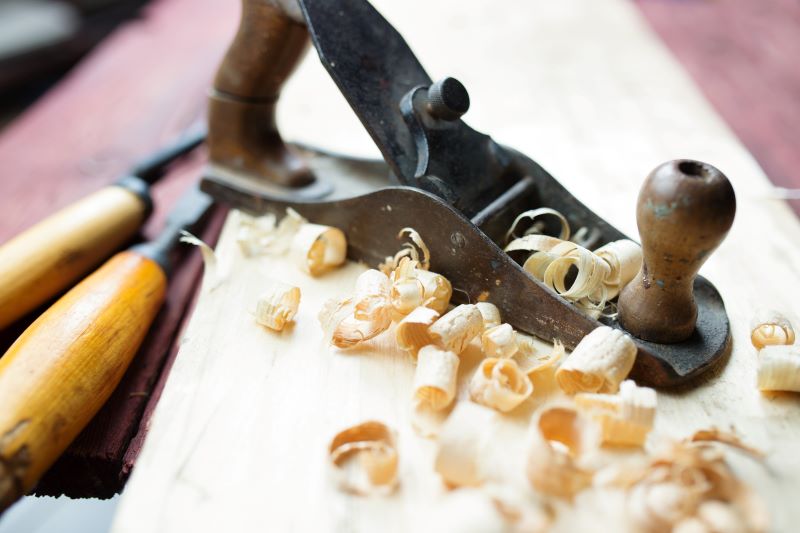
How To Use a Hand Plane – Even If You’re Not a Woodworking Expert
Parts of a Bench Plane
Sole: This is the base of the plane. It is best to keep it straight and flat so it needs to be protected from damage.
Mouth: The mouth of the plane is designed such that the wood shavings can easily be cleared away.
Frog: This is a machined iron wedge that receives the blade assembly and can fine-tuned using the adjustment levers.
Blade Assembly: This is composed of the three parts listed below. When you need to sharpen your plane or carry out maintenance, you can remove the blade assembly.
Blade: Usually made of carbon steel – pretty self-explanatory.
Cap Iron: A stiffening plate clamped over the iron to tension it and clear shavings
Lever Cap: This clamps the assembly to the plane body
Using Your Hand Plane
How To Adjust A Plane – The Easy Way
Small tweaks to your plane are generally pretty straightforward. Here are some of the most common adjustments you may need to make.
- If you’re using softwood, set the cap iron 1/16 inch back from the cutting edge. For finer finishes or hardwood, you will need to reduce the gap slightly. Do this by realigning the cap iron and securing it to the back of the blade. A tight fit is essential as it prevents shavings from getting wedged in.
- The width of the mouth opening is influenced by the position of the frog. For general woodworking, simply line up the frog with the top edge of the mouth. For finer work, the mouth needs to be narrower. Remove the blade and the cap iron to loosen the screws that fix the frog. Move the frog to the required position using the adjustment screw.
- To increase the depth of cut, simply push the blade out. You do this by turning the adjustment nut clockwise. Checking the setting is simple. Hold the plane upside down making sure the sole is level with your eye. The cutting edge should appear as a thin black line. With fine work, you should barely see the edge.
- Use the lateral adjustment lever so that the blade is protruding equally across the width. Move the lever from side to side. Check alignment with the plane held upside down. When the blade is set, take up the slack so the blade can’t move.
How To Plane Timber True To Size
When you need to plane your timber so it’s true to size, be sure to press down firmly at the start of every stroke. As you reach the far end, slow down. This will prevent “bowing off.”
Follow this order of work and get the job done in no time…
- Begin by planing one face
- Check for straightness in both directions using a square
- Do a visual check for any sign of twisting
- Make a face mark with a pencil
- Plane the first edge
- Test again for squareness and straightness
- Make an edge mark
- Gauge across the thickness on both sides
- Plane the second face to the gauge marks
- Gauge across the width on both sides
- Plane the second edge
Handy Hints
General Pointers
- You should always sharpen and adjust your plane before use.
- Wax is amazing. A piece of candle works wonders by helping you to lubricate the sole.
- Use the right stance. Stand with your outer foot braced in front. Your shoulder, hip and plane should form a straight line. This gives you full control.
How To Plane a Wide Board
- Move the plane across the wood diagonally in both directions.
- Overlap your strokes to cover the whole surface, with and against the grain.
- Finish with fine shavings in parallel strokes in the direction of the grain.
How To Plane a Narrow Edge
To keep the plane centered on a narrow surface, pop your thumb on the toe and use your fingers as a guide.
Checking a Surface
Use the tilted edge of your plane as a straight edge to check if a surface is flat. Use the straight edge diagonally to check up on winding.
Support The End Grain and Edges
This is essential to stop the wooden fibers on the edge breaking away.
Hold the plane centrally at the point of balance. Let the wood overhang slightly.
An alternative is to support the end grain by gluing it or clamping a piece of scrap wood to the work piece. This keeps any splintering to the waste wood.
Summary
Woodworking is a great hobby and a hand plane is most likely the first tool that you will use. It takes a little practice but soon you will be moving from simple tasks to tackling those intricate home improvement projects!
Related Posts
-

Tools help to make work easier and therefore you need to know how to take…
-

Purchasing a home and moving in is an exciting milestone in most people's lives.…
-

This graphical guide shows you 12 different types of screwdrivers and the most common use…